
When we first moved in to our house we found out that the beautiful dining table Vito had made for our apartment was too big for our dining area in the kitchen! I was so sad! You guys, this table he made is BEAUTIFUL! I’m totally bummed it won’t be our dining room table now. It does have a new home in the basement as my craft table! But this still left us without a table.

We scoured Facebook Marketplace for months. It all payed off when we found a table with 6 chairs for $50! You can always find amazing deals on Facebook Marketplace! I love this table. I believe it’s from the 80’s and has a really cool shape. Best part? It fits in our dining area!
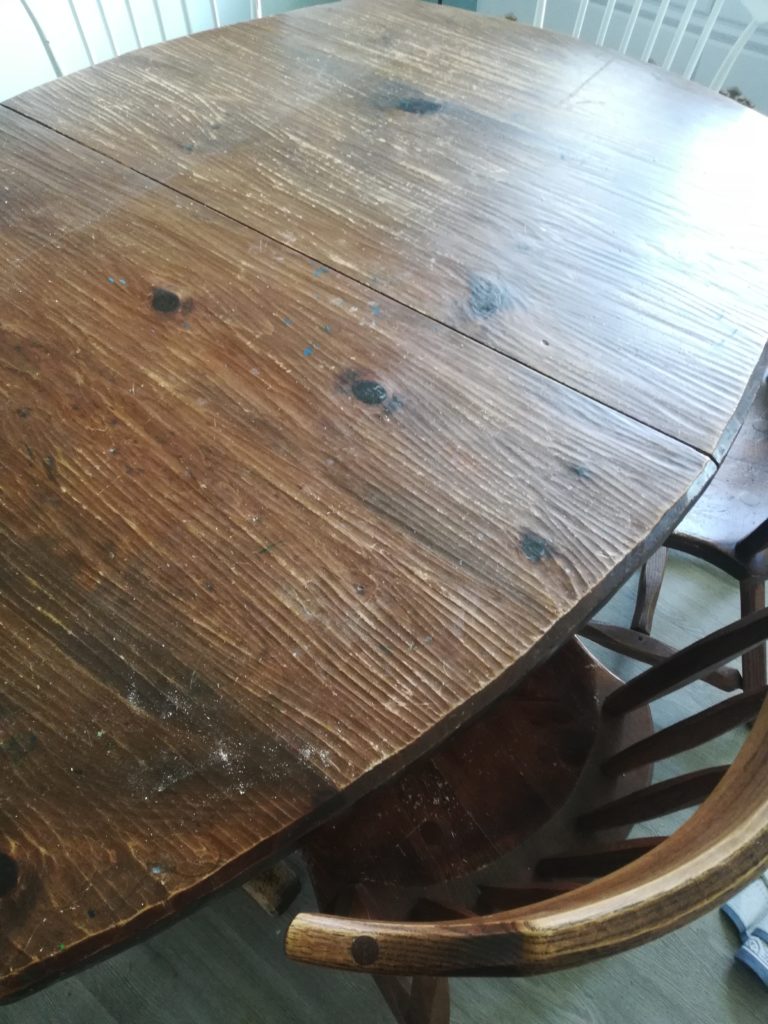
The table needed a lot of work. it had this weird wavy/grooved texture to the top that had to go! I wanted to paint the trestle white and stain the top a dark walnut brown.

This project was slightly daunting. So much sanding! I sanded the finish off of the trestle (after we had to make a run to Home Depot to buy a new sander when the one we had broke… what’s a DIY project without a run to the hardware store!?). I used 120 grit sandpaper for the trestle because I didn’t need to completely take off the finish since I was painting it eventually. As you can see from the pictures there are still some patches of the tables original finish and that’s ok!

Finally, I got started painting it. I started with Sherwin-William’s Primer – 2 coats. The color we got from Sherwin-William’s as well. It’s called Cotton White. Once the coats of primer were dried and cured I painted on 2 coats of the Cotton White.

In between coats on the trestle we began sanding down the table top. It needed a LOT of work! I had to get rid of that crazy grooved texture. Call me crazy, but I like a dining room table with a smooth surface! I used 80 grit sandpaper to get rid of the grooves. I could feel my arms getting sore as I went. It’s always a good idea, when refinishing a table top, to sand it all down with the leaves in. That way all the surfaces match up and are even. Once everything was smooth, I used a 120 grit over the whole surface then a 200 grit just to make it silky smooth.

Once the table top was done with sanding we could stain it! I decided on Minwax Dark Walnut stain. Thankfully, Vito did all of the staining for me! I was getting pretty tired of working on this table. He wanted to make sure the table would take the stain evenly. One way to do this is to open the wood grain. Take a damp-wet (you don’t want it sopping wet, but slightly more wet than damp) cloth and rub it over the wood. Let it dry a few minutes then apply stain. Once the stain is dried and cured Vito applied Minwax Polycrylic Protective Finish. Once all the coats of the finish were applied, dried and cured, we put the table back together! I’m so happy with how it turned out! It looks amazing!
Finished!


Looks beautiful!!
Thank you!
Wow! What a transformation! Beautiful work guys!
Thank you!! 🙂