two weeks ago we lost one of our chickens, Mary-Lou. She had been sick for a few months and we were doing everything we could for her. I’ve learned it’s hard to care for a sick chicken because it’s hard to find a vet that will treat a hen. Sadly we couldn’t nurse her back to health. I feel rather guilty about it, I keep wondering if there was something more I could have done. All I can do now is keep researching and learn more about what to do for sick hens in the future…
- This post includes affiliate links which means I will get a small commission when the link is used and the item or service is purchased. This will in no way add any additional cost to you.
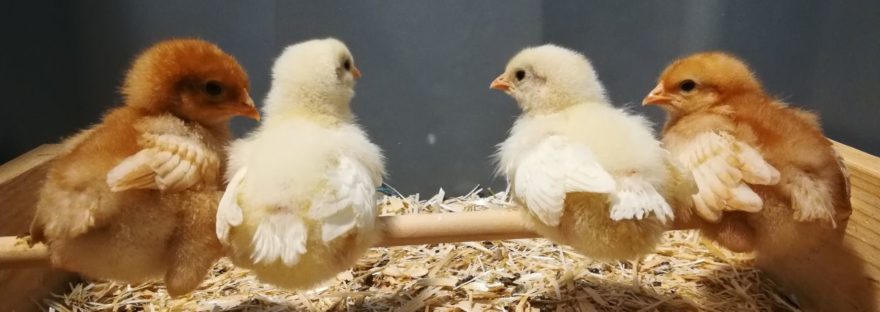
Fast forward a few days, Vito and I decide we should maybe go get a chick or two. We want to be able to have a good supply of eggs and be able to share them with family and friends. Now seemed to be a perfect time. Did you know all places you can buy chikcs has at least a 4 chick minimum? We did not… So here we are with 4 new chicks! We stopped by our local Tractor Supply Co. and picked out 2 Leghorn chicks (will lay white eggs), 1 Golden Comet chick (will lay brown eggs), and 1 ISA Brown chick (will lay light brown – chocolate brown eggs). They are too stinking cute!

Before we got our chicks, I prepared a spot to keep them in the house. This is the first step if you are thinking about getting chicks – have everything set up before you go get them! There are lots of DIY brooders out there, luckily I had a big plastic bin with tall sides (here’s what I had) that works perfectly. I took the lid off and put chicken wire across the top. I secured the chicken wire by wrapping it around the lip of the bin, it’s tight and not going anywhere so I can rest the heat lamp on top and just the right height. Although, now the chicks are two weeks old and are practicing their flying. They like to hop up on to their waterer and feeder jars and jump off of them as they flap like crazy! it’s adorable and hilarious, but this makeshift lid that only covers 3/4 of the bin will no longer work! We’re working on a solution…
Heat is very important for chicks. They need to be kept at 95°F for the first week of their lives. After the first week the temperature can be lowered by 5 degrees for every week following. I have this heat lamp (here’s one) and you’ll need either a bulb (here’s one) or, I have this ceramic heat emitter that does not produce light (here’s one).

I set up the feeder (Here’s one) and waterer (here’s one) as well. I used my own mason jars to screw into the feeder and waterer. When we bought our chicks we also picked up a couple bags of Dumor Organic Chick Starter Crumble, which was the only thing I had not set up before we went to pick up the chicks. Everything else was ready to go right when we got home, I even had the ceramic heater on so the brooder would be just the right temperature when we first put them in. Lastly, bedding. We already had some for our chicken coop so I just used that (this is what we had).

Since we got them, we’ve added a few toys into the brooder to keep them entertained. I had a small compact mirror I was able to hang up for them. Vito built a small roost out of some scraps of wood we had lying around. They love both of these things! It’s so fun to watch them play around with each other and the toys we’ve added. Although right now their favorite game is “push all the bedding into the waterer!”
I need help coming up with a fourth name! So far we’ve decided on Idah, Mable, and Stella but I can not find another name i like! Comment with your suggestions!
They are so cute! How about Elsie? Or Gertie?
Elsie is a good one! thanks for the suggestion!
They are so cute! How about Betty?
That’s a good suggestion!